Using a few guides on the web and a little bit of ingenuity I was able to get my FTDI-based, USB to 2x Serial adapter working in Mac OSX 10.9 Mavericks with iTerm 2. This post documents the process and resources used in the hope of becoming the definitive guide to setting up a USB serial adapter in OSX and using iTerm2 as the terminal emulator. Even if it isn’t quite definitive, it should at least be useful to others - I hope!
Choose your weapon
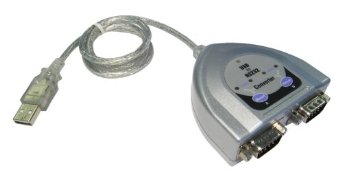
The dual serial adapter above is my weapon of choice. You can pick one up for about £20 on Amazon(not an affiliate link). Generally speaking, I’ve had better experience with FTDI chipsets so if you are in the market for an adapter, I’d recommend checking the chipset first…
Driver Installation
For FTDI
- Download the FTDI VCP driver for OSX
- Install the drivers
For Prolific
- Download the drivers from here
- Install the drivers
A quick note on terminal emulation in OSX
Most likely you have used a USB-serial adapter in Windows. When installed It appears as a COM port, you point TeraTerm or HyperTerminal to that COM port and everything automagically works. In OSX things are decidely more UNIX-like. When the adapter is installed you will see a new “tty” and “cu” devices in “/dev”. To access these you need an application to attach to the “cu” device.
Why “cu” and not “tty”? Because TTY-lines are for inbound connections and Call-Up ("cu’) lines are for outbound.
There are a number of applications that can do this, but I’m going to focus on using “screen” as it’s built in to OSX.
Setting up iTerm2
I use iTerm2 for all my terminal needs in OSX, more on that later… Right now we’re going to focus on adding a profile for your USB adapter(s).
-
Open iTerm2 and enter the following to find your usb serial TTY’s
:::bash ls /dev/ | grep cu.usbserial -
Open the Preferences menu and click Profiles
-
Add a new profile (or duplicate your existing one) a give it a descriptive name. Something like "USB Serial 1 - 9600baud” for example.
-
In the “Command” section, select Command and enter the following, replacing FTDYUKSO with the output from Step 1.
:::bash
screen /dev/cu.usbserial-FTDYUKSO <options>
The
in the “screen” command you can add anything from the screen manpage and/or a comma separated list of values from the stty manpage The following will give you a 9600 baud, 8-bits per character, no parity and 1 stop bit (default for most network devices) :::bash -f 9600,cs8,-parenb,-cstopb,-hupcl -
Repeat steps 3 and 4 for the second adapter.
-
Fin
Using your USB Serial adapter
- Open iTerm
- Select one of the profiles you just created
- Hit “Enter” and begin
- To quit, press CTRL+A+K or CTRL+A then CTRL+\
Note: If you don’t quit properly, i.e just closing the tab in iTerm, you will leave the your session alive and you won’t be able to reconnect until you kill the session manually.
Conclusion
Hopefully this guide has been useful in helping you get set up with your USB serial adapter in Mac OSX. If you find mistakes, have feedback or questions feel free to use the comments section below.
Resources
The following resources were used to write this blog post: