Continuing on this week's theme of Markdown, I'll be explaining how to add Markdown to your blog in 3 easy steps.
Step 1 - Install the WP-Markdown plugin
From your Wordpress dashboard, head over to the Plugins tab and click
Add New. Search for "WP-Markdown" and install
Step 2 - Enable Markdown for specific pages
Once your plugin has been installed, head on down to Settings > Writing and scroll to the Markdown section pictured below.
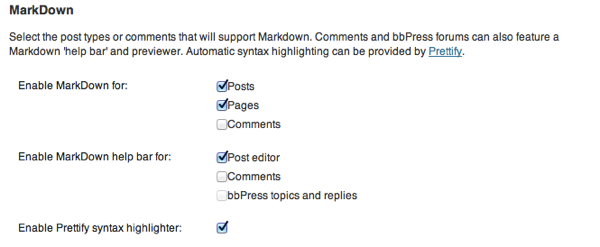
Enable Markdown wherever you like, but I'd recommend pages and posts
WARNING: Enabling Markdown will affect your existing posts/pages. I noticed that while my posts didn't look any different on the outside, behind the scenes they were a mess and required a little trying up.
Step 3 - Try it out
Create a new post or page and practice your Markdown-Fu. Not sure where to start? Here's an example
# This is a first level heading

Here is some body text

## Second level of heading here
### And a Third
#### And so on and so forth

- Now some bullets
- Hopefully you are getting the hang of this now
- It's pretty easy

> Blockquotes are easy with Markdown too
Happy writing
@dave_tucker